
Toronto Real Estate Photo Prep Checklist (Agent + Seller Version)
Great real estate photography starts before the camera comes out. In Toronto and the GTA, listings often compete for attention within minutes of going live, so preparation can directly affect how polished a property looks online. This checklist is designed for agents and sellers who want smoother shoots and stronger final images.
Toronto real estate photo prep checklist helps improve listing readiness, consistency, and faster publishing when agents follow a repeatable process.
Declutter high-visibility surfaces
Kitchen counters, bathroom vanities, entry tables, and bedside surfaces attract attention in wide-angle photos. Remove small appliances, cords, paper stacks, personal items, and excess decor so the room reads as spacious and clean.
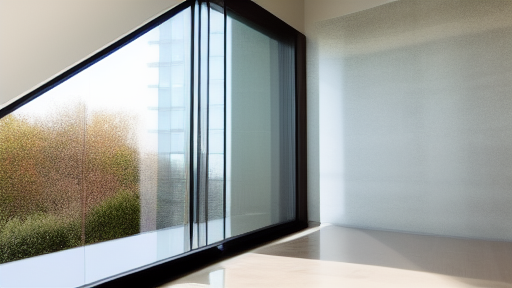
Open blinds and check lighting consistency
Natural light helps rooms feel inviting, but mixed lighting temperatures can create uneven color. Before the shoot, open blinds/curtains, replace dead bulbs, and use matching bulb temperatures where possible.
Hide personal identifiers
Family photos, school schedules, and personal documents distract buyers. A neutral presentation helps buyers picture themselves in the space.
Prep exterior shots
Sweep walkways, move garbage bins, park cars away from the front elevation, and tidy the porch/entry. Exterior curb appeal often drives the first click.
Plan specialty media early
If you need drone, video, 3D tours, or virtual staging, coordinate it before shoot day so the media team can prepare the right schedule and equipment. Click Media Pro offers integrated listing media services from one team. See the services page for package options.
Create a shot-priority list
Flag the rooms and features that matter most for marketing: renovated kitchen, skyline view, oversized lot, or premium finishes. This helps prioritize images that support your listing strategy.
Final Tip
Good prep saves editing time and improves image quality. For GTA listings, explore our Toronto real estate photography service, browse the gallery, and request a quote.
Related GTA Service Areas and Resources
If you serve multiple neighborhoods, compare our city-specific real estate photography pages and choose the best package for the listing type and location.
For the full service overview, visit our Toronto real estate photography page, review services, and request a quote.
External Resources
For broader market and industry context, review CREA (Canadian Real Estate Association) and RECO (Real Estate Council of Ontario). These resources help compare standards, consumer guidance, and professional practice expectations.
Toronto real estate photo prep checklist: Practical Checklist for Better Results
Use a repeatable checklist to reduce delays, improve communication, and create more consistent listing assets. A documented process helps agents, sellers, and photographers stay aligned before the shoot and during the review stage.
- Confirm scope and deliverables before booking (photos, drone, video, 3D tours, twilight)
- Send a prep checklist to the seller 24-48 hours before the appointment
- Identify priority rooms and hero shots for MLS and social promotion
- Plan review and approval time before the listing goes live
- Reuse assets across MLS, social, email, and brokerage channels
Common mistakes to avoid
Last-minute scope changes, incomplete staging, and unclear shot priorities are the most common reasons turnaround slows down. Keeping the workflow documented and consistent usually improves both speed and media quality.